Welcome!

Showing posts with label eats. Show all posts

Thursday, February 13, 2014

my mama's homemade vegetable stock


stock, or broth, is one of those items that we always like to keep on hand.  true, you can usually substitute water with no serious side effects, but a good stock gives such a nice punch of flavor to whatever you're cooking, i think it's worth it.

something i really like about making my own stock is that i can control the amount of salt that gets added.  you usually add salt to whatever you're making anyway, so why start with a salty base if you don't have to?

this recipe comes to us from my mom, and it couldn't be easier.  when i make this, i usually double the recipe so i have 12 cups total on hand for the week.  the broth lasts about a week in the fridge and a good long while in the freezer.  this is a great way to use up any veggies which may be passing their prime. 

also, i'm not too worried about the soy sauce affecting our compost, so i do throw all of the veggies in the compost pile once they've been cooked.  circle of life. enjoy!

homemade vegetable broth
makes 6 cups
ingredients:
2 carrots, cut into large chunks {no need to peel}
1 onion, halved
2 celery stalks, cut into chunks
2 large red potatoes, quartered
1 bay leaf
1 small bunch parsley
black pepper
2 tablespoons soy sauce
6 cups water
mushrooms {to taste...about 1/2 cup dry, 3/4 cup fresh, sliced}
olive oil


directions:
heat olive oil over medium high heat in a large stock pot.  when hot, add all veggies except dried mushrooms if you're using those {if you're using fresh mushrooms, go ahead and add them now}, and saute until lightly browned {watch the potatoes...they may stick to the bottom of the pan}.  once browned, add the water, soy sauce, parsley, bay leaf, dried mushrooms, and a generous sprinkle of pepper.  bring to a boil, then reduce to a simmer and cook, covered for about 1 hour.  strain veggies from broth.


happy eating!

Thursday, January 16, 2014

good to know

while i was pregnant, {and especially now that i'm nursing} we began to look most closely at what we eat.  to sum up the research i did: the drive these days to increase efficiencies on all fronts has led to some pretty serious side effects for our food.  we certainly can't afford to eat all organic, but we do make sure to select those items for which we get the most delicious bang for our buck. 

the environmental working group published this great chart to help determine which fruits/ veggies are best to buy organic, and which are ok to eat when grown conventionally.  i have found this to be super helpful and i hope you do as well. 

this list covers the infamous "dirty dozen" with a few extras...as explained on the site: "For the second year, we have expanded the Dirty Dozen™ with a Plus category to highlight two crops – domestically-grown summer squash and leafy greens, specifically kale and collards. These crops did not meet traditional Dirty Dozen™ criteria but were commonly contaminated with pesticides exceptionally toxic to the nervous system."  Source: Environmental Working Group


do you eat organic?  why/ why not? 

Friday, December 20, 2013

juliet, 8 days...and cookies!

a cute baby and cookies?  my kind of post.

my sister brought these cookies to the hospital the day juliet was born and i seriously devoured them.  it's ok though, because regardless of my giving myself all sorts of dietary liberties these days, these are not your average cookies: they're actually good for you!

try them out and let me know what you think...and if you don't care for them, call me - i will take them off your hands, no problem.

good-for-you-but-don't-taste-like-cardboard cookies

2 cups quick-cooking oats
3/4 tsp. salt
1 tsp. ground cinnamon
1 cup almond butter, peanut butter or sunflower seed butter {i use almond...no salt added}
1/4 cup pure maple syrup
1/4 cup apple butter {*check the labels when you buy this: many of the brands out there add a lot of extra sugar - we found that whole foods carries a variety relatively low in sugar, fyi}
1 large banana, mashed {about 1/2 cup...you can adjust this depending on how banana-y you like things}
1 cup dried fruit {cranberries, cherries, raisins, chopped apricots, blueberries...all work well}
1/2 cup shelled pumpkin seeds
1/4 cup ground flax seed (optional)
{you can also add about 1/2 cup of dark chocolate chips if you want a little sweetness}

preheat oven to 325 degrees. line a large cookie sheet with parchment paper and set aside.
 
combine all ingredients {except flax seed} into a large bowl or stand mixer.  mix until all of the ingredients are combined - using either the stand mixer, a hand mixer or a good 'ol wooden spoon. the dough will be stiff.  when everything is incorporated, add the flax seed and mix...if you add the flax at the beginning, it tends to just stick to the sides of the bowl and not get worked into the dough.
 
 
using a cookie scoop, tablespoons, or your hands, drop the dough onto the prepared cookie sheet {you can make these cookies however large/small you'd like}  slightly flatten the tops into the desired thickness...the cookies will not spread in the oven.


bake for 15-17 minutes or until the edges are slightly brown.  allow to cool on the cookie sheet completely.  
cookies will stay fresh at room temp for 1 week; they keep well in the fridge, and can be frozen for up to 3 months.  {they're especially good frozen, dunked in your coffee!}
 
 
these people make me the happiest:
 
daddy's little girl
 

Sunday, October 6, 2013

green veggie wash.

if you haven't gathered already, i am no fan of germs...and i am even less of a fan of chemicals commonly used to get rid of them.  this has lead to some creative solutions when it comes to keeping my home and family healthy.

one of my favorites such fixes is this veggie wash. 

like everyone, we try to buy organic produce when possible, however the money tree in the yard hasn't bloomed yet this year, so generally we buy conventional.  regardless of whether they're organic/ conventional, fruits and veggies are not clean when you bring them home from the store.  from tree to table, they have been handled by a lot of people, and who knows how many of them washed their hands after a sneeze?  {i know, i don't like to think about it either}

washing with water is good, but not great, and i honestly feel like the food tastes better when it's cleaned with a little more effort {don't you feel better after a nice bubble bath?  i thought so}. 

so here you have it: green veggie wash

what you need
castile soap {i recently picked up the citrus variety, and love it - especially for this use}
water
baking soda
small spray bottle
small shaker {i reuse an old spice shaker, which you can refill as needed - works like a charm}

the spray bottle i have is from the target $1 section, and holds about 5 oz.  i use between 1/2 and 1 teaspoon of castile soap for every 5 oz of water...just add the soap and fill up the bottle - give it a little swirl {no need to shake, it will mix when you add the water} and you're good to go!


step 1: spray your produce with the soap solution


step 2: sprinkle with baking soda {baking soda is a mild abrasive, so it will get in there and really clean the skins}
step 3: scrub the fruits & veggies to work in the baking soda {bonus: this will leave your hands super soft too}
step 4: rinse

note: yes, you definitely need to wash hard-skinned veggies, even those whose skin you don't plan to eat -  including squash, carrots, even watermelon.  {remember the listeria scare a few years back?  the actual fruit of the cantaloupes was fine, but the bacteria on the surface was transferred to the fruit when it was cut, making everyone sick...moral of the story?  wash your fruit.}

so there you go!  now go clean some veggies! 

Sunday, September 15, 2013

butternut squash soup, two ways.

today at the grocery store i found myself face to face with a really good sale on squash {$0.79 per lb!}...and thus came home with 8 lbs of butternut squash.  i would've had more, but they did not have any spaghetti squash and the acorn squashes just looked meh...another gourd for another day. 

so this afternoon jordan went to play a little golf, and i decided to cook up my prize.  i made a gigantic pot of a really basic squash soup {our standard recipe is here}...i didn't have any sweet potatoes, so this version just included an onion, carrots, celery and butternut squash.

i usually wait until the soup is cooked before adding any spices {this goes for salt too} and blending, and when this step arrived i decided to have a little fun.  why make one type of soup when i could make two?   {or 3 or 12...8 lbs of squash will make a gracious plenty}

here are my two creations...if one of them strikes your fancy, try it out and let me know how you liked it!

south of the border
1/4 teaspoon cumin
1/2 tablespoon mexican oregano
2 teaspoons ancho chili powder
sprinkle of cinnamon
cayenne to taste

sub-continental
1+ teaspoons turmeric
2+ teaspoons madras curry powder
sprinkle of galangal {ok- not an indian spice, but i like the slight sweetness this adds}
cayenne to taste

measurements are of course subjective since it will all depend on how much soup you're working with...i now realize that because of that fun fact, this is a terrible recipe to follow - sorry about that...play with the flavors though!  i am sure you will make something delicious.


happy eating!!

Saturday, September 7, 2013

welcome, weekend!


i feel that this weekend is just full of potential.

we have been thoroughly enjoying ourselves this week, and i feel so well-rested that i am now ready to tackle some projects and get my creative side working.

i have a lot planned, which i love...there is something truly inspiring about keeping busy in my mind.   there is a wall which will get some color, floors which will be washed {am i the only one who puts off this chore until it literally cannot be avoided?}, crafts to begin, and a few recipes to try.

here are a few delicious things i am going to try to whip up this weekend:

Everything Bagels
{image and recipe via: abeautifulmess}

we have been stopping into a cute bagel bakery close by home for a few weekends now on our way to our weekly grocery shopping, and i love the tradition.  i have always been curious however, about making bagels myself: and truth be told, i am always a little disappointed in the cinnamon to raisin ratio in my CR bagels...so i will be attempting this recipe tomorrow morning, modifying the flavors, and of course loading them up with cinnamon (:

next up: granola!   {another recipe} i loooove granola.  i love the possibilities of adding new flavors, and i don't think it can be messed up too easily.  one tip i will share right off the bat: if you add coconut flakes, wait until there are only about 5-6 minutes of baking left because those little guys like to burn. 

i'll be back soon with updates, but right now i have some serious progress to make.  enjoy your weekend! 

Thursday, August 8, 2013

edamame gets all fancy.

these days i'm always up for a snack.

here is one of my attempts at a quick, healthy little something.

edamame, lemon, red pepper flakes, salt...presto snack-o.


prepare edamame according to package directions.
squeeze the juice from 1 lemon over pods.
sprinkle lightly with kosher salt & red chili pepper flakes.


happy eating!

Monday, July 29, 2013

cheese.


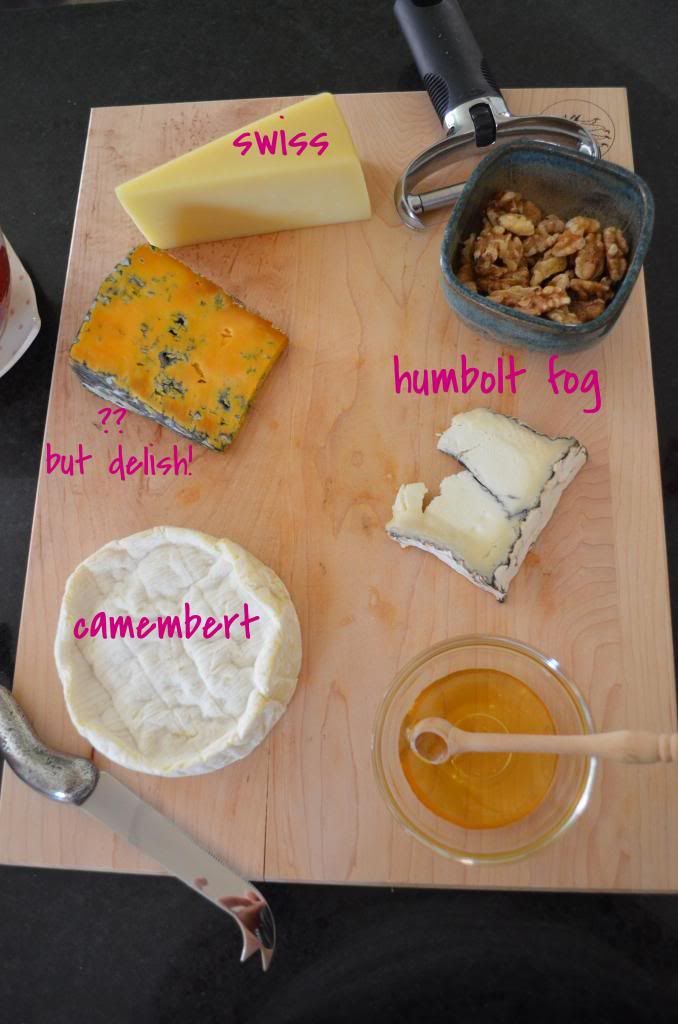
i love cheese.  so much so, that last christmas, one of my gifts from my husband was a slice of my favorite {humbolt fog} fresh from our newly-opened whole foods.  


i am making a cheese board for a little shin-dig at our place this weekend, so i thought i'd give my two cents on what makes a good selection.

1. the stinkier the better!  ok not always, but don't turn down a bite that doesn't smell like ye olde cheddar.  there are so many interesting flavors out there- go for it!

2. make sure there is a variety- not just of flavors, but of origins...namely: cow, goat and sheep.  personally, goat cheese is my fave: i love the slight grassiness, and they are usually very creamy and rich.  everything i want in my queso.

3. add some extras.  there is always the requisite bread/ crackers, but i also like adding fruit, honey, jam, nuts, meat, etc to the mix.  i really don't think you can go wrong.

4. you don't have to spend a fortune: with the exception of the humbolt fog {which is on the pricey side, i will admit}, all of the cheeses below came from trader joe's...and you know joe loves a bargain.

here is a peek of a board i made a little bit ago...sorry i can't remember the orange one, but it was great! 

  photo 5135cf60-09a0-4f14-a5fd-fbd7053a108b_zps0c15b539.jpg

as always, happy eating!

Saturday, February 16, 2013

what we've been eating lately, and a new trick!

soups. lots of soups.
winter is for soup, people.
and so?  we eat soup.

something i like about soups is you really can't mess them up.  whatever you
happen to have on hand is most likely going to work perfectly.
add a few spices, and bam- you've got dinner for a week.

 case in point: a little while ago, i found myself with a large butternut squash that needed to be eaten,
as well as some apples which were getting a little mushy...so i gathered together some of the usual suspects, chopped everything up, put it in a pot and called it 'soup'.


 chop everything to about the same size, add it to a pot with some olive oil, and cook over medium-high 
heat until the toughest ingredient {for me, carrots} is tender enough to be pierced with a fork.


then, add about 2 or 3 cups of broth and bring to a boil {add more broth 
if you want it to thinner}. lower the heat to a simmer and add any spices you like.
this time, i loaded it up with indian spices: turmeric, madras curry powder, a little cayenne 
{it's good to keep things spicy}
cook until you feel that your flavors are melded {20 minutes?}...like i said, 
you really can't mess this up.

i chose to blend my soup, but i think it would be equally as good left chunky.  

and...voila! 
soup.

we like to take soups to work for lunch...they're not too heavy, but they fill you up, and 
it's always nice to have something warm and homemade in the middle of the day.


next!

do you like brussels sprouts?  i love them.  but i hate cabbage...irony.
anyway, we picked up some sprouts the other weekend- cut them in half, added
olive oil, garlic {you can even leave the cloves in the paper- they roast just as well}, salt and pepper, 
and roasted them at about 450 until they were soft and getting a little brown {about 20 minutes}.

 so. good!
for us, this made a meal...somehow these little things really fill you up.
but if you have more of an appetite, i think this would go really well as a side to 
roast chicken, or even a pasta tossed with fresh herbs, and a side of crusty bread.

try them, and let me know how you like them! 


so i did promise you a trick.

i have always wanted to learn how to throw pizza dough.
and you want to know something?  it's really not hard.
but it looks pretty impressive...so next time you have a dinner party,
throw some dough.  i think you'll have some impressed guests.


 the finished product: broccoli pizza with shrooms and mozz.
interesting combo, and pretty good!

and for something sweet, sometimes i like to make cinnamon buns.
{i used fannie farmer's recipe}


 happy eating, friends!

Saturday, December 29, 2012

christmas this year.

some snaps of the holidays this year with my family.

such good people.

good times.

and of course, good food.

enjoy.


mama & heidi

sisters!

roasted carrot soup. (:

dinner!

sometimes i worry my dad is too serious...

emily!

everyone's favorite cone-kitty, mr. charlie

i hope your holidays were filled with family and warm memories.

wishing you the best for 2013

love, jordan & steph

Saturday, December 8, 2012

veggie mac + cheese

this is hands down one of the most favorite meals in this house.

we don't make it too often, since it's not exactly good for you {however i feel that the veggies and whole wheat pasta help a little, right?  right? } anyway, when we do make it, it's a real treat.

hope you enjoy!

ingredients
1 pound whole wheat pasta {we like penne}
2 bell peppers, any color
1 medium sweet onion
2 zucchini squash
6-8 crimini mushrooms
3 cups marinara {homemade or store-bought}
about 1 1/2 cups cheese: any combination of fontina, gruyere, comte or mozz works well
herbs of your choice
salt & pepper
olive oil

*1/2 cup parm
*1 cup breadcrumbs
*1-2 tablespoons butter

*optional ingredients in case you choose to make the breadcrumb topping...we usually leave it off, but it sure is good (:  


directions

*breadcrumbs: melt the butter in a small saucepan over low heat; stir the breadcrumbs in to coat with the butter.  stir in the parm, and set aside, off of the heat.

put a large pot of salted water on the stove and start bringing it to a boil. 

next, grate your cheeses and set them aside.

start by washing and then chopping all of your veggies to about the same size: one to one and a half inches is good.  when you cut the onions, make sure you slice them "pole to pole"...this way they won't be stringy as they cook.  

do you know how to wash mushrooms?  i think they're a pain to wipe off with a wet paper towel, but i was always told that you should not soak them, etc...however i found this note that seems to indicate that as long as the dirt is gone, the method used doesn't really matter.  do what you like (:  

arrange the veggies on a baking sheet, drizzle with olive oil, and add a little salt and herbs.  i like herbes de provence, however simply adding salt and pepper would be great.  


put the vegetables in a 300 degree oven to roast for about 20 minutes, checking and stirring once in a while...you don't want them to be too brown, just softened a bit.

while the vegetables are roasting, your water should be close to a boil...add your pasta, but only cook for 6-7 minutes {it will cook more while it bakes}. when the pasta has cooked, strain it and place into a {very} large bowl...or you might use two bowls.

when the veggies are roasted, add these to the bowl{s} of pasta.  next, add the cheese and marinara.  mix it up! you want to distribute the cheese evenly over all of the other ingredients.

when everything is mixed, divvy the deliciousness into either one 9x13 baking dish or two smaller baking dishes.
{we use 2 smaller dishes and save one for another day's dinner!}

*if you want to add the breadcrumb topping, top the pasta mixture with the crumbs now and pat lightly.

cover the dishes with foil and bake at 350 degrees for about 35 minutes {ovens vary}...we rotate the dishes while they cook.  when you have about 10 minutes to go, take the foil off to let things brown up a bit.  the crumbs are a good indicator here: when they are golden, you're good to go (:

serve immediately and enjoy!

{if you made two dishes, let the second pan cool, then cover again with foil and pop that in the fridge for another day.  reheat covered at 350.  they keep well for up to 2 days in the fridge}

happy eating!!


Saturday, October 13, 2012

you know it's fall when...

the drop in temperature, the crunch of a leaf, pumpkins being spotted everywhere, and at least in our house, the oven becoming almost entirely used for making chex mix.  i don't know if you feel this way too, but for whatever reason, chex mix doesn't hold much appeal to me at any other time of the year, but come october i cannot get enough.  yes, it is fall.

well, you guys...chex mix got even better for me this year.  i know, it's a classic...and i had no qualms with the original recipe ...until i ran out of onion powder.  {ever start a recipe thinking you have everything until get to the part where you need what you actually don't have?  busted.}

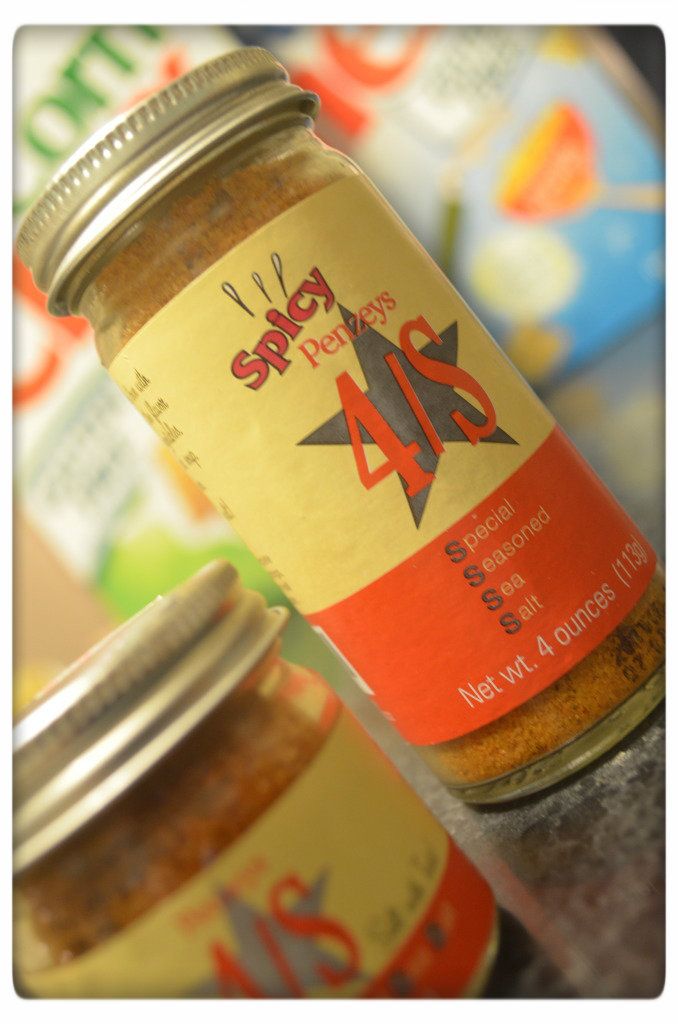
enter penzeys to save the day.  remember my love affair with this company?  still going strong.  this salt combo hadn't seen much use in our kitchen other than a sprinkle on some popcorn, but figuring that garlic powder alone wouldn't do the trick, i added some 4/S {spicy!} to the batch and crossed my fingers.
DSC_0062-001

you guys!  this. is. awesome!  i am so happy with how it turned out, i think this is my 'new original'.

here's how i made my mix...sorry these are not all accurate measurements, i don't really feel that chex mix is one of those things that needs to be all that precise.  {if you want more accuracy, the original recipe is always on the box (: }


chex mix remix

heat oven to 250 degrees

melt between 6-8 tablespoons of butter {use the real stuff} in a roasting pan in the oven...no problem if you don't have a roaster, you can use a disposable foil baking pan

when the butter is melted {about 5 minutes...keep an eye on it}, take the pan out of the oven and add a good few splashes of worcestershire sauce to the pan {about 3 tablespoons}

add a total of about 7-8 cups of: corn chex, rice chex, wheat chex, pretzels, nuts, goldfish, etc...{whatever you are into, and in whatever ratio you desire}...stir until this is pretty well coated with the butter-worcestershire combo

lightly sprinkle garlic powder over the entire pan, then follow with a light sprinkle of 4/S.  stir this up again and pop in the oven {still @ 250} for 1 hour, pulling the pan out every 15 minutes to stir...this is important to prevent the top layer from burning

i like chex mix to be extra-flavorful, so sometimes when i pull the pan out for a stir, i add a little extra dash of worcestershire sauce and a quick sprinkle of spices, but this is up to you (:


hope you like it, and happy eating!!


Tuesday, October 2, 2012

DIY


so back to that to-do list i made a while ago...happy to say i actually did stuff!

this is a project which has been on my mind for some time, but i knew i wanted to to it "right" aka not spend big bucks and make it unique, so it's taken me some time.

i had to hunt down the materials first, and i scored big with a yard sale 2 saturdays ago.  done.  then i needed a quick run to home depot which is quickly becoming one of my favorite spots {they seriously have everything...} and i was good to go!

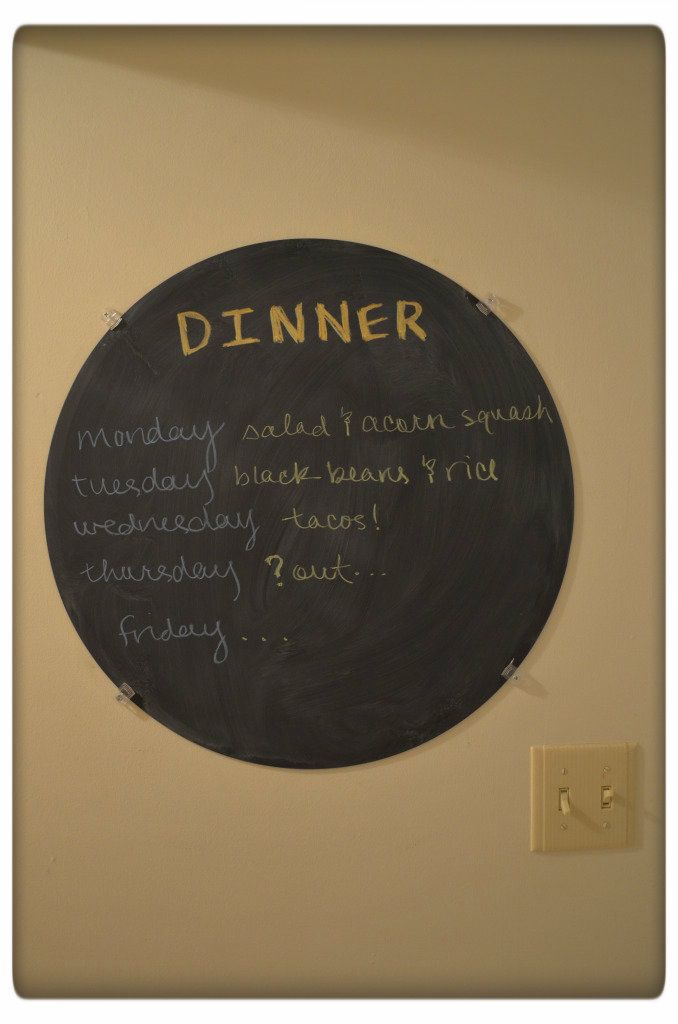
so here you are: my chalkboard menu!


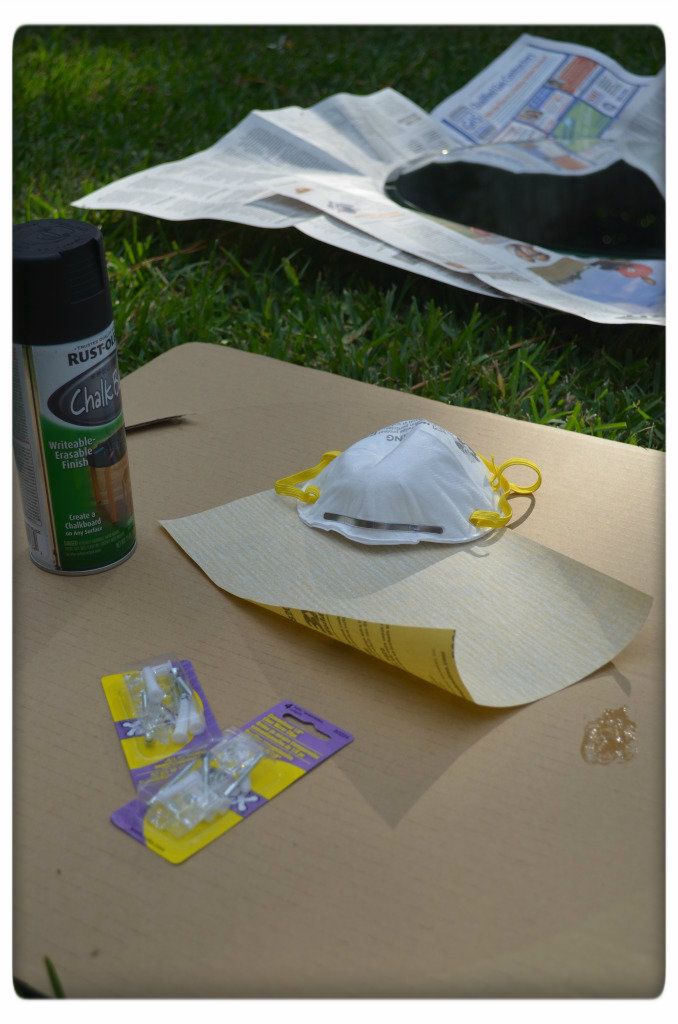
what you will need:
DSC_0113the actual "menu"- any smooth surface will work, so i wasn't necessarily looking for a mirror - an old window or a large picture frame {glass still in} would work just as well...or you could paint a wall, but that wasn't the look we were going for

a can of chalkboard spray paint {i did not use a primer, and i'm happy with the results, but that's up to you}

mask for fumes

sandpaper {if your surface is really super glossy or needs a little smoothing}


how to:

prep your surface with sandpaper if necessary.  following the instructions on the can of paint, apply slowly and evenly to your surface, covering entirely.  let this dry for 1 hour.


{while my first coat was drying i made this little bag for chalk}


after 1 hour, come back and spray the whole surface again.  let this dry for at least another hour before touching, but preferably 24 hours.  now, if you're like me and sought a cheap-o option, your mirror probably doesn't have hooks on it.  no problem {especially if your husband is as handy as mine (: }  go pick up some mirror clips and you're in business.   make sure everything is anchored properly, screwed in tight, etc and here you have it!


DSC_0059

ah.  i'm really happy with how it turned out...and also happy that tonight is black beans & rice night!!


*note: my spray paint said to rub the side of chalk over the whole board once dry then erase before use...i did not like this suggestion b/c the board was so nice and black before i did that, and now it's a little cloudy.  oh well, it would've ended up like that anyway, but fyi in case you try this!

Saturday, September 8, 2012

what we've been eating lately...


here are a few things making our house smell good these days...


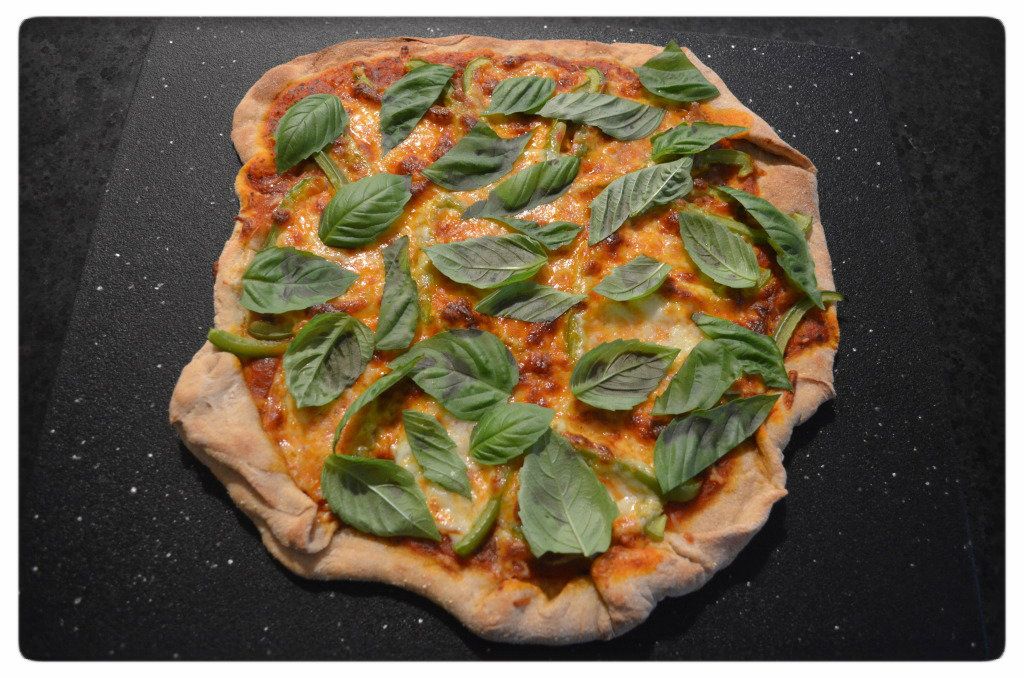
 cheese pizza with bell peppers and basil


DSC_0024
bruschetta, one of our faves
 
DSC_0084
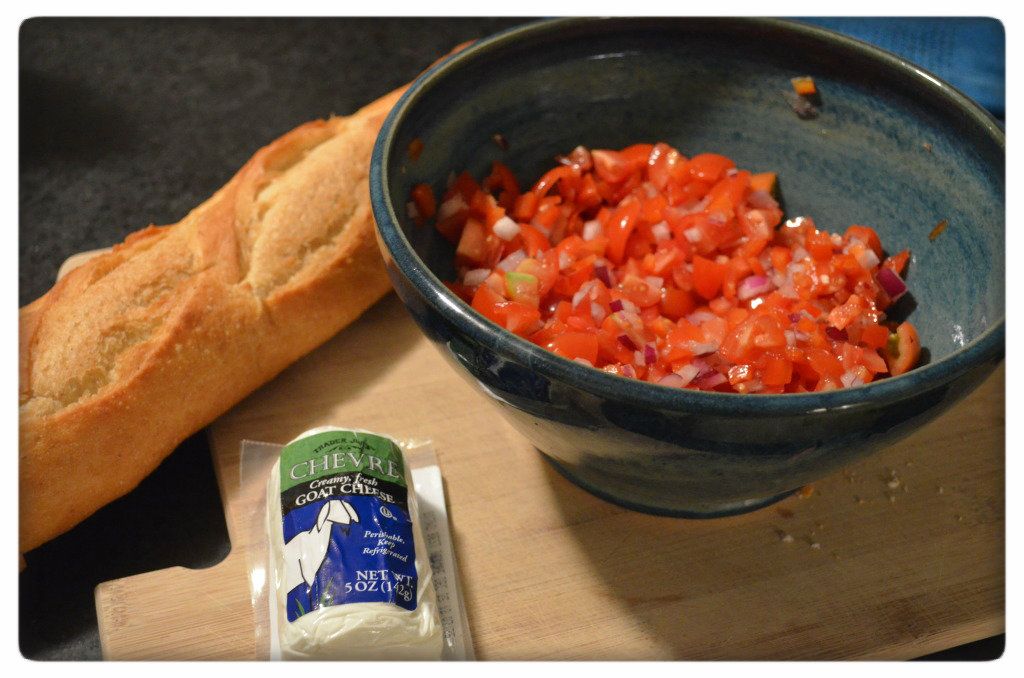
seriously, all you need to put this together is what you see below, plus basil and olive oil.
chop some tomatoes {sometimes we add a red bell pepper}, red onion, garlic if you like {not necessary}, add some s&p.  toast thin slices of baguette brushed with olive oil, spread some goat cheese on the toastettes and top with your tomatoes.  you can pop this back in the oven for a sec if you'd like, but it's just as good at room temp.  serve with basil and a drizzle of olive oil.

DSC_0079

as always, happy eating!